

This wooden spool snowman ornament is proof that the cutest Christmas decorations don’t have to be complicated! Using just three wooden spools and basic craft supplies, you can create an adorable “Frosty” that looks like it took hours but actually comes together in one afternoon.
No fancy techniques, no week-long projects—just a simple wooden spool craft that gets finished! We know how rare that can be. Transform new or (better yet) recycled vintage wooden spools into the snowman’s body and hat. That natural wood texture gives you the cozy, handmade charm that store-bought ornaments can’t match.
Simple Modifications for Crafting with Kids

This project is designed for adults and teens because of the small parts (button eyes, toothpick nose, and jingle bells). Want to make it with younger kids? Use a large jingle bell for the base, and let them paint faces and “belly buttons” directly onto the wooden spool surfaces instead—same cute result, zero worry.
Wooden Spool Ornament Supplies You’ll Need
👉 Download and print your FREE Wooden Spool Snowman Ornament Project Sheet.
A little hint that makes this wooden spool project even easier? Gather all the materials and read through the instructions first! This may look like a long list, but you probably have most of these supplies in your craft stash:

Materials for Your Wooden Spool Snowman Ornament
- 3 empty wooden spools (small, medium, and large) – vintage or new
- 2mm black foam (or 1-1/2″ to 1-3/4″ black button) for hat brim
- wooden toothpick (pointed tip) for nose
- 2 small (⅛”) black buttons for eyes
- 3 larger (¼”) buttons for belly
- 9″ length of 3/8″ to 1/2″ wide ribbon or fleece for scarf (I used a 1/2″ wide piece of fleece)
- 2 jingle bells (½” – gold or silver)
- 30″ length of black yarn or craft string
- White, black & orange paint
- Craft glue
Tools You’ll Need
- Your FREE printable project sheet
- Paintbrush
- Small scissors
- Hole punch (for foam hat brim)
- (Optional) Small piece of tape or masking tape
| Supplies | Description | Features | Price |
|---|---|---|---|
 | Shop on Amazon | ||
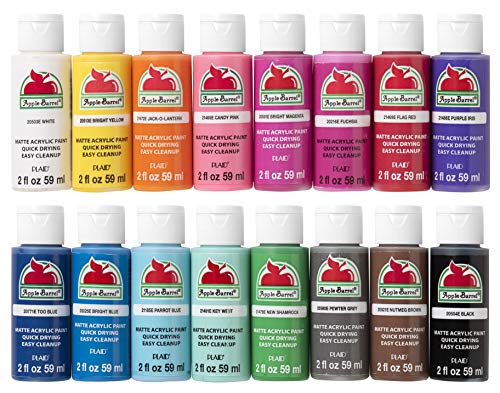 | (Under $30) | Shop on Amazon | |
 | (Under $5) | Shop on Amazon | |
 | Under $5 | Shop on Amazon | |
 | Shop on Amazon | ||
 | Under $5 | Shop on Amazon | |
 | Shop on Amazon | ||
 | Under $5 | Shop on Amazon | |
 | Under $7 | Shop on Amazon | |
 | Under $10 | Shop on Amazon |

Make Your Wooden Spool Snowman Ornament: Step-by-Step Instructions
Ready to create your snowman ornament? Let’s get started!
👉 Want to print out your instructions? Grab your FREE Wooden Spool Snowman Ornament Project Sheet!
🛠️ Prepare the Nose Hole and Hat Brim
Before painting, you’ll need to prep a couple of pieces for your snowman ornament.
1. Create the hat brim: Cut a 1 3/4″ diameter circle from 2mm craft foam, then use a hole punch to create a hole in the center. This allows the yarn to thread through easily.
Want an even easier hat brim? Use a large 1.5″ to 1.75″ diameter button instead—it makes your snowman look like he raided your sewing case! 🙂

2. Drill a small, shallow hole in the side of the medium wooden spool about 3/8″ above the base using a 3/32″ drill bit. This should make a hole that a standard toothpick would fit in, but you may need to adjust the bit size depending on the thickness of your toothpick.
Not comfortable with drilling? No problem! Try these alternatives instead:
- Painted nose: Simply paint a slim orange carrot nose directly on the white wooden spool, or
- Felt nose: Cut a small triangle nose from orange felt and glue it on when adding Frosty’s facial details.
🎨 Paint the Spools & Toothpick
PRO TIP: Here’s a game-changer for painting wooden spools—slide each one onto the tapered handle of a clean paintbrush! The taper keeps the wooden spool steady, allowing you to rotate it while painting without getting paint on your fingers.
3. Paint your large and medium wooden spools white for the snowman’s body and head.
4. Paint the small wooden spool black for the hat.
5. Paint one end of the toothpick orange for the carrot nose.
6. Apply 2 coats of paint on all pieces for full coverage and let dry completely (overnight is best) before assembling your snowman.
🧵 Assemble Your Snowman Ornament

Now, build your Snowman Ornament from the bottom to the top:
7. Take your 30″ piece of black yarn and string one jingle bell to the halfway point. Gather the two ends together so the bell sits at the center.
8. To make the next steps easier, tape the two yarn ends together with a small piece of masking tape.
9. Thread the yarn ends through the large white wooden spool (snowman’s base).
10. Thread the yarn through the medium white wooden spool (the head). Make sure the pre-drilled nose hole is positioned about 3/8″ from the bottom edge of the spool (the edge that will rest on the large spool, forming the neck).
11. Thread the yarn through the hole in the black foam circle (hat brim).
12. Thread the yarn through the small black wooden spool (hat).
13. Thread on the second jingle bell. (If your taped yarn ends are too thick, separate the ends now and run the two strands through the jingle bell hole separately.)
14. Remove the masking tape and separate the two yarn ends.
15. Pull the yarn snug so all pieces are stacked, then tie a knot at the base of the second jingle bell to hold everything together.
16. Tie the two yarn ends in a knot 8–10″ above the second bell to create your hanging loop. Trim the yarn ends 1/2″ above the knot.
🔍 Add the Details
Now, get ready to add the details that make Frosty “come alive”!

17. For toothpick nose: Trim your pre-painted orange toothpick to your desired length with scissors, then glue it into the hole you drilled in the medium wooden spool (the head). For a felt or painted nose: If you chose an alternative nose method, add your orange nose now. At about 3/8″ up from the base of the medium wooden spool, either glue on the felt piece or paint the nose directly on the wooden spool.
18. Use a small dab of craft glue to attach the two small black buttons as eyes on the head, positioning them above the nose.
19. Glue the three larger buttons vertically down the center of the large wooden spool for the snowman’s “belly.”
20. Tie the 9″ fleece strip or ribbon around the “neck” (between the large and medium wooden spools, just under the nose) as a scarf.
- Bonus detail: Make ½” cuts into each end of the fleece to create cute tassels!
- Extra tip: A tiny dab of hot glue can keep the scarf positioned perfectly if it keeps sliding around.
21. Let all glue dry completely before hanging your new ornament.
Make More Christmas Ornaments to Share!
See how satisfying it is to finish this project? Your wooden spool snowman is ready to bring handmade charm to your tree—and if you’re like most people, you’re probably already thinking about making another one!
Enjoy showing off your adorable Frosty, and don’t forget to snap a photo of your finished wooden spool creation. There’s nothing quite like that “Look what I made!” moment!
More Holiday Projects on Creative Home Crafts:
+ Ping-Pong Penguin Ornaments
+ Wooden Clothespin Toy Soldier Ornaments
+ Make Festive Reindeer Gift Tags
+ How to Make Gingerbread Coffee Syrup (+ Free Printable Gift Tags)
+ How to Use Rosemary for DIY Gifts & Crafts

For a FREE Wooden Spool Snowman Project Sheet, complete & submit the form below to gain instant access:

